
Hardening Your Kubernetes Fortress, Part 1: Auditing with kube-bench

Kubernetes has won the container orchestration war, but managing its security can feel like defending a medieval fortress. With countless configurations, APIs, and workloads, it’s easy to leave a door unlocked or a wall unguarded that can lead to serious security incidents.
Simply deploying your application isn’t enough. We need to proactively audit our defenses and stand watch for active threats. This guide will give you a practical, hands-on approach to do just that. We’ll use two powerful open-source tools:
Part 1 : kube-bench: To audit our cluster configuration against industry best practices (the CIS Benchmarks). Think of this as the architect checking our fortress blueprints for weaknesses.Part 2 : Falco: To perform real-time threat detection based on container behavior. These are the guards on the walls, watching for suspicious activity.
By the end of the part-2, you will have run a security audit, fixed a critical vulnerability, and detected a simulated attack in real-time.
Prerequisites
To follow along, you will need a working Kubernetes cluster. For this tutorial, we’ll use minikube as it's the easiest way to get a local, single-node cluster up and running.
Start your cluster with a simple command:
minikube start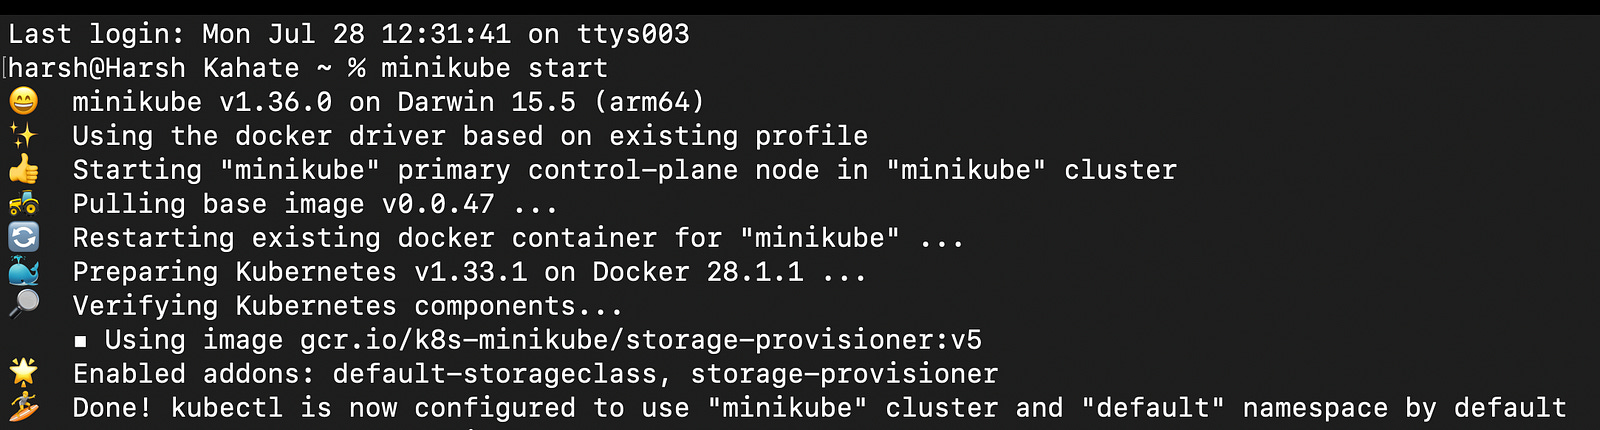
Part 1: Auditing Your Kubernetes Cluster with kube-bench
kube-bench is a Go application from Aqua Security that checks whether your Kubernetes deployment meets the security configurations detailed in the CIS (Center for Internet Security) Kubernetes Benchmarks. Instead of manually checking hundreds of settings, we can run it as a job in our cluster.
Step 1: Run the First Scan
We will run kube-bench using a Job manifest. Create a file named job.yaml:
apiVersion: batch/v1
kind: Job
metadata:
  name: kube-bench
spec:
  template:
    spec:
      hostPID: true
      containers:
        - name: kube-bench
          image: aquasec/kube-bench:latest
          command: ["kube-bench", "node", "--benchmark", "cis-1.23"]
          volumeMounts:
            - name: var-lib-kubelet
              mountPath: /var/lib/kubelet
              readOnly: true
            - name: etc-systemd
              mountPath: /etc/systemd
              readOnly: true
            - name: etc-kubernetes
              mountPath: /etc/kubernetes
              readOnly: true
      restartPolicy: Never
      volumes:
        - name: var-lib-kubelet
          hostPath:
            path: "/var/lib/kubelet"
        - name: etc-systemd
          hostPath:
            path: "/etc/systemd"
        - name: etc-kubernetes
          hostPath:
            path: "/etc/kubernetes"
Let’s understand the above YAML file in detail :
The job.yaml file is a declarative manifest that tells Kubernetes exactly what you want to create. It defines a Job object, whose purpose is to create one or more Pods and ensure that a specified number of them successfully terminate. Let’s break down the file section by section.
These first three lines are standard for every Kubernetes object.
apiVersion: batch/v1: This tells Kubernetes which version of its API to use to create this object.Jobobjects belong to thebatchAPI group, which is used for batch processing and tasks that run to completion.kind: Job: This specifies the type of object we want to create.metadata: This section contains data that helps uniquely identify the object.name: kube-bench: We are naming our Job "kube-bench".
The spec section describes the desired state for the Job.
template: This is the most important part of the Jobspec. It is a blueprint for the Pod that the Job will create. The Job controller will use this template to generate the actual Pod object.
This spec block (inside the template) defines the actual details of the Pod that will be created.
hostPID: true: This is a critical and powerful setting. It gives the Pod's container access to the host node's Process ID (PID) namespace. This means the container can see all the processes running on the host node, not just its own.kube-benchneeds this to inspect the running control plane processes.containers: This is a list of one or more containers that should run inside the Pod. We only have one;name: kube-bench: A name for the container.image: aquasec/kube-bench:latest: The container image to pull from a registry (like Docker Hub).command: ["kube-bench", "node", "--benchmark", "cis-1.23"]: This is the command that will be executed inside the container when it starts. It tells thekube-benchprogram to run anodescan against version1.23of the CIS benchmark.volumeMounts: This section mounts the volumes (defined below) into the container's filesystem, making the host's files accessible inside the container;mountPath: Specifies the path inside the container where the volume should appear.name: Refers to the name of a volume defined in thevolumessection.readOnly: true: A good security practice, ensuring the container cannot modify the host's files.restartPolicy: Never: This is important for aJob. It means that if the container fails, Kubernetes will not try to restart it. The Job will simply be marked as failed, allowing you to inspect the logs to see what went wrong. The other option,OnFailure, would cause it to retry.volumes: This section defines the storage volumes that can be used by the containers in the Pod.hostPath: This type of volume mounts a file or directory from the host node's filesystem directly into the Pod. This is the key mechanism that allowskube-benchto audit the node's configuration files.path: The actual path on the host node (e.g.,/etc/kubernetes).name: A name for this volume definition, which is referenced by avolumeMountabove.
What Happens When You Create a Job? A Backend Look
Before we apply the file, what actually happens when you tell Kubernetes to create a job? Understanding this process reveals the power of the Kubernetes control plane.
When you run kubectl apply -f job.yaml, a chain reaction kicks off:
kubectlto API Server : Yourkubectlclient reads the YAML, converts it to JSON, and sends a REST API request to the Kubernetes API Server.API Server : The API Server authenticates you, authorizes that you’re allowed to create
Jobobjects, and validates that your YAML is correctly formatted.etcd(The Cluster's Brain) : Once validated, the API Server writes this newJobobject intoetcd, the cluster's reliable key-value store. This is now the "desired state."Job Controller : A controller process inside the control plane is constantly watching for new
Jobobjects. It sees ourkube-benchjob and knows its duty is to create a Pod to perform the task. It generates a Pod definition from thetemplatesection of ourjob.yaml.Pod Object Creation : The Job Controller sends this new Pod definition back to the API Server, which validates it and saves it to
etcd. At this point, the Pod exists in the database but isn't running anywhere yet.Scheduler : The Scheduler sees this new Pod with no node assigned to it. It analyzes the cluster’s nodes and picks the best one (in our
minikubesetup, there's only one choice). It then updates the Pod object inetcdwith the chosen node's name.kubelet: On the chosen node, thekubeletagent is always watching for Pods assigned to it. It sees thekube-benchpod, pulls theaquasec/kube-benchimage, creates the container, mounts the requested host directories (/etc/kubernetes, etc.), and finally runs the command specified in the YAML.
Let’s run the job now.
# Apply the job
kubectl apply -f job.yaml
# Wait for the job to complete (check using 'kubectl get jobs')
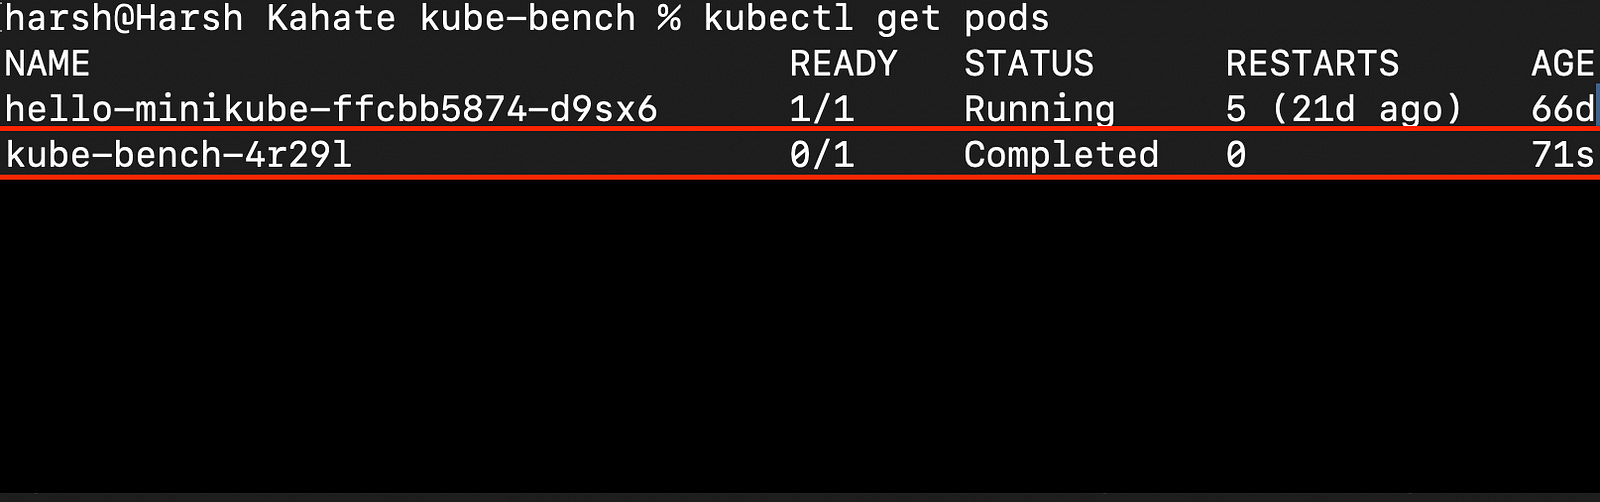
# Find the pod name
kubectl get pods
# View the logs from the pod (replace <unique-id> with yours)
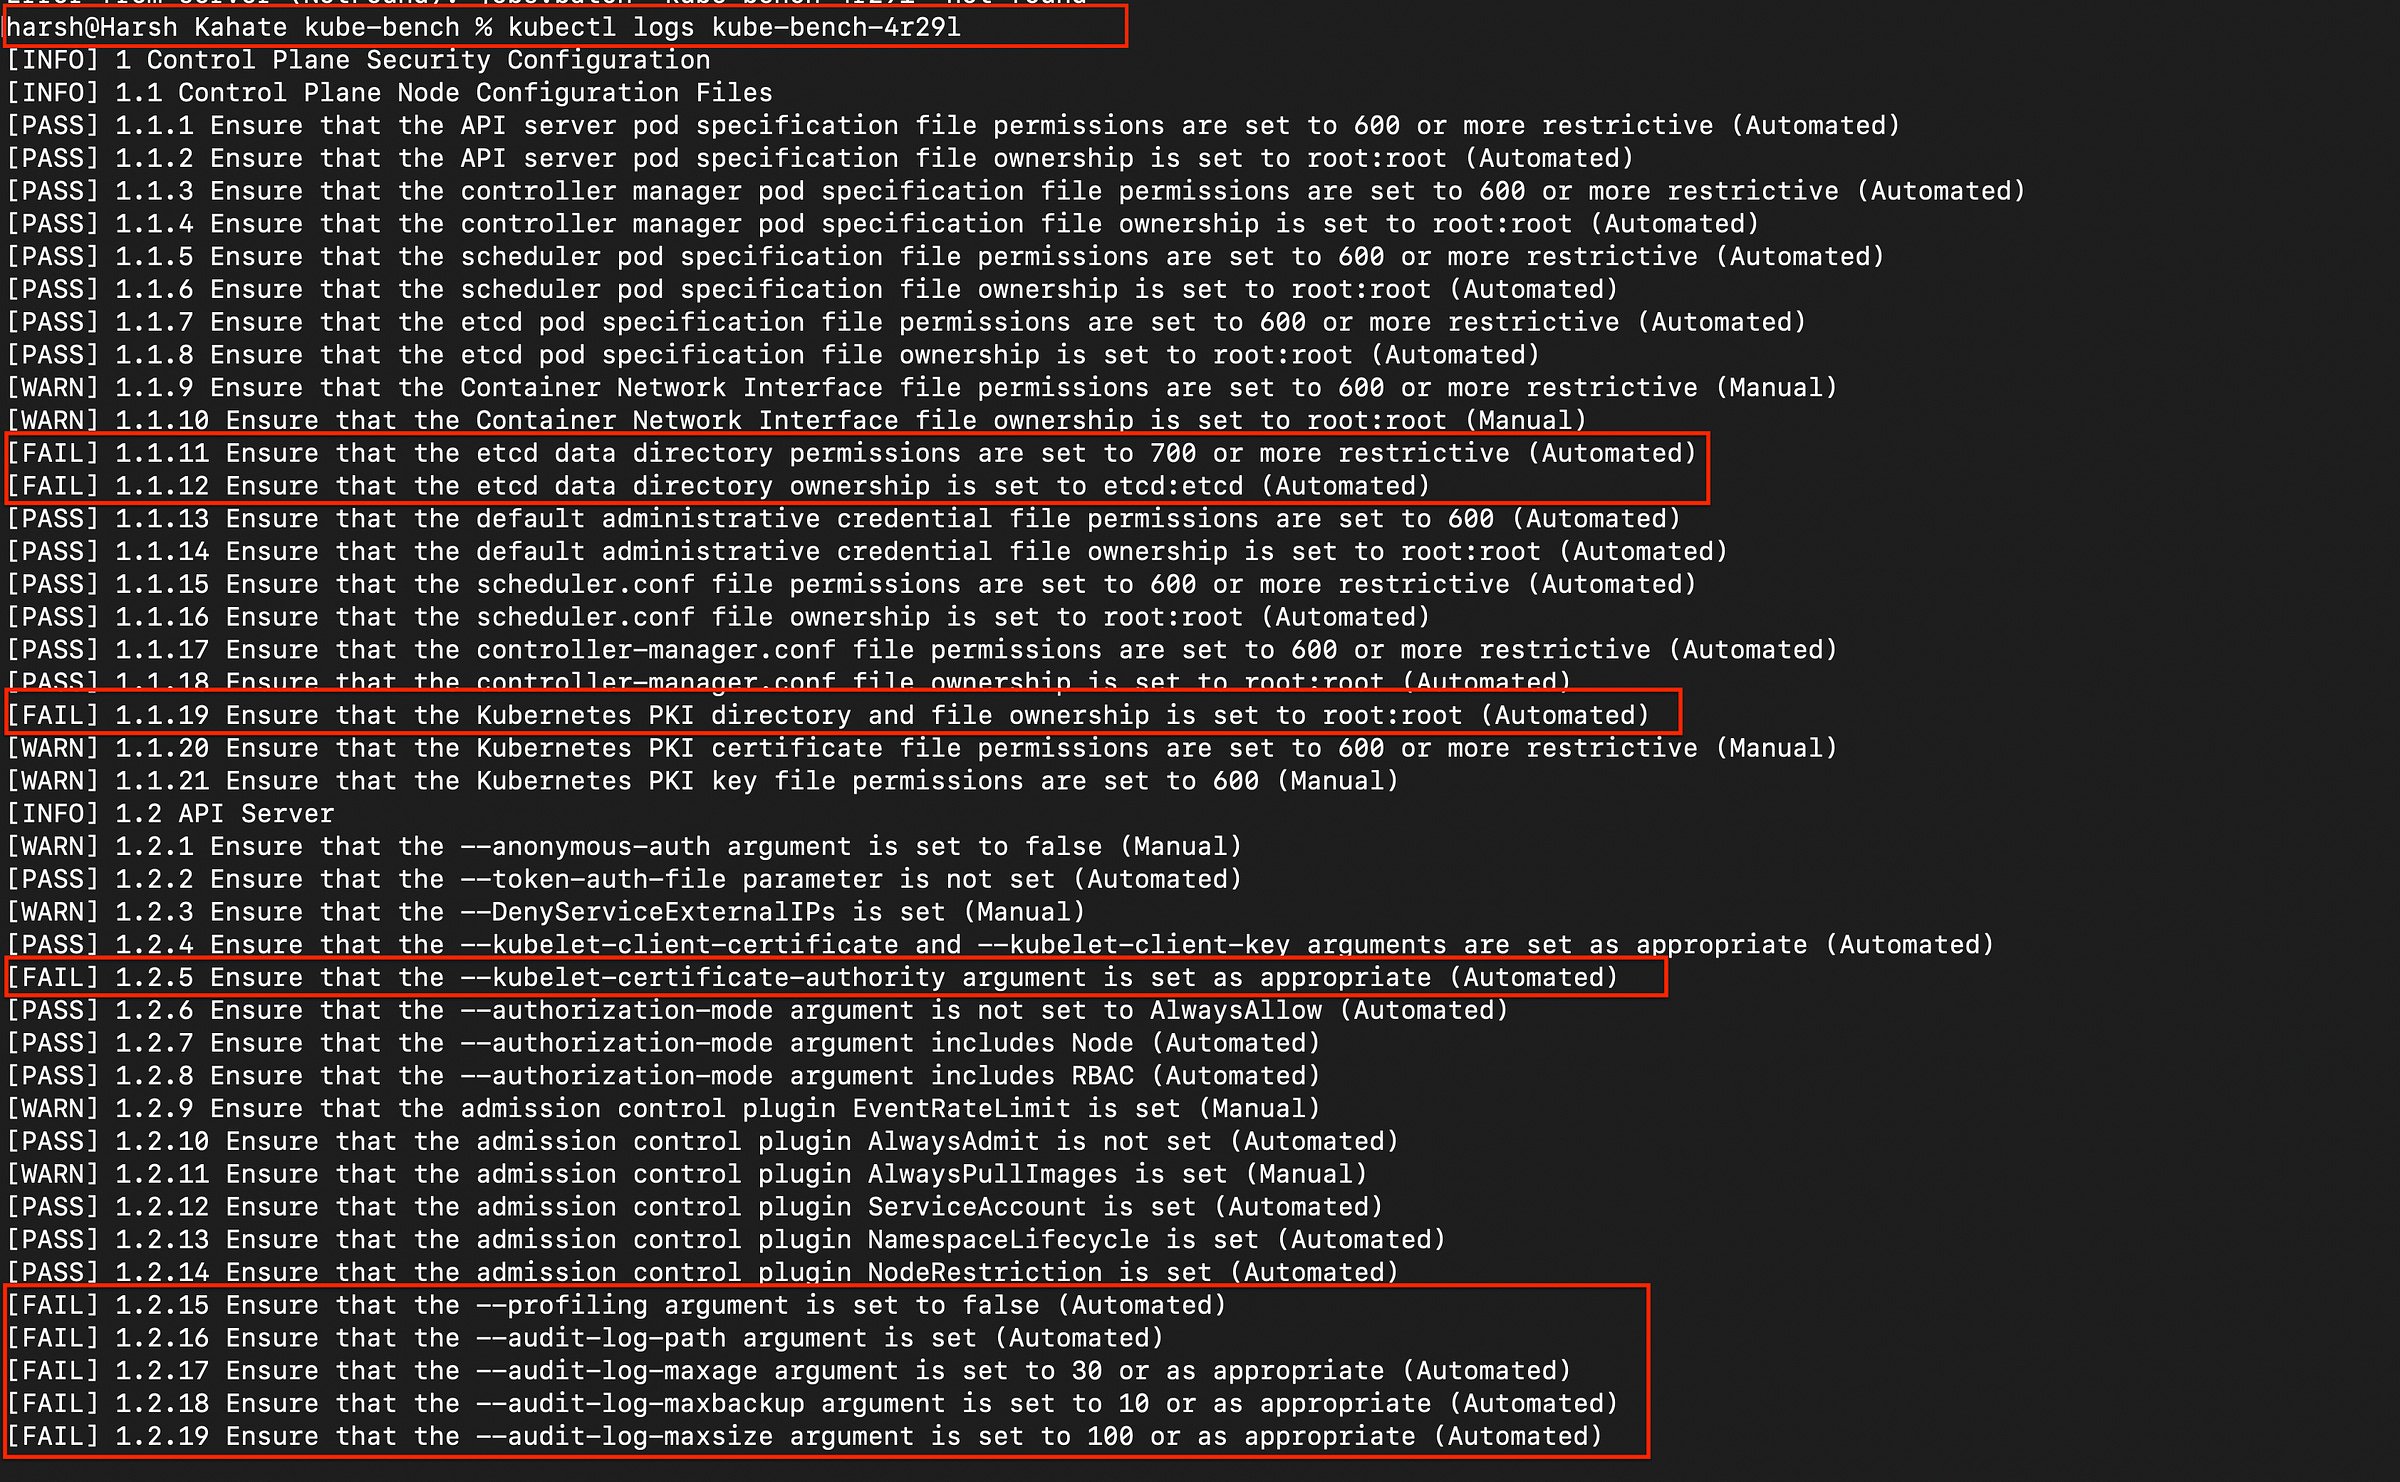
kubectl logs kube-bench-<unique-id>
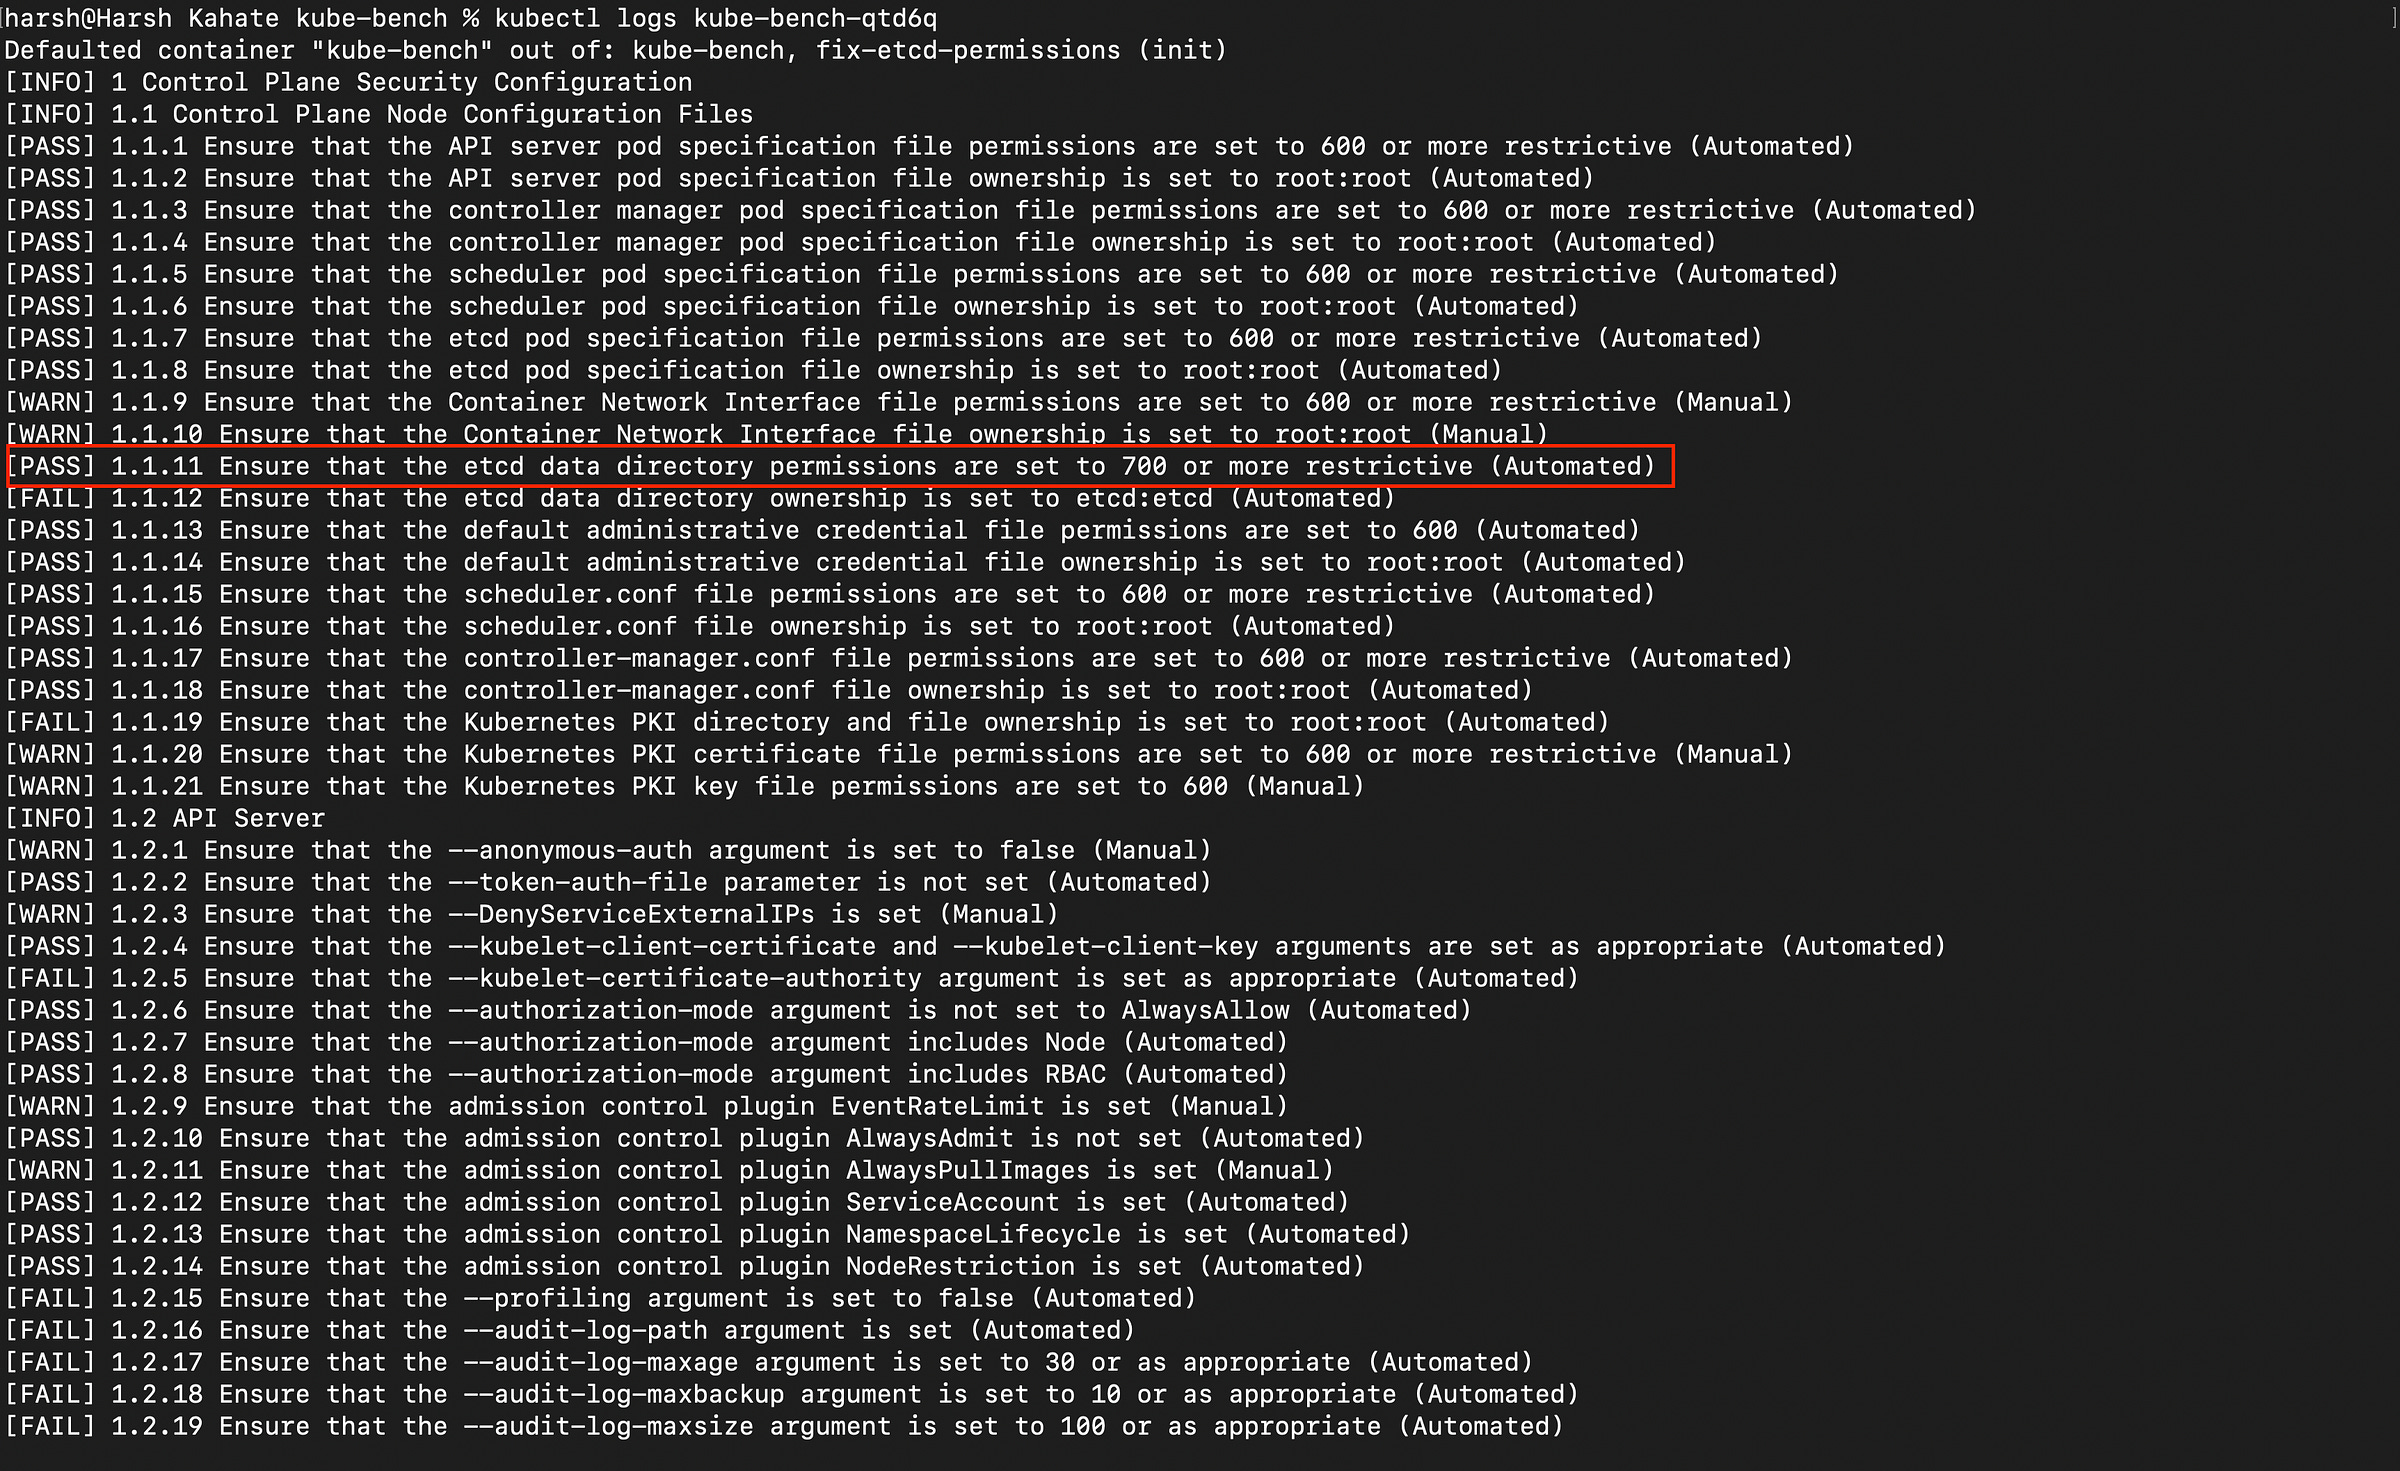
As you can see in the below image, multiple controls are failing. There are vulnerbilities.
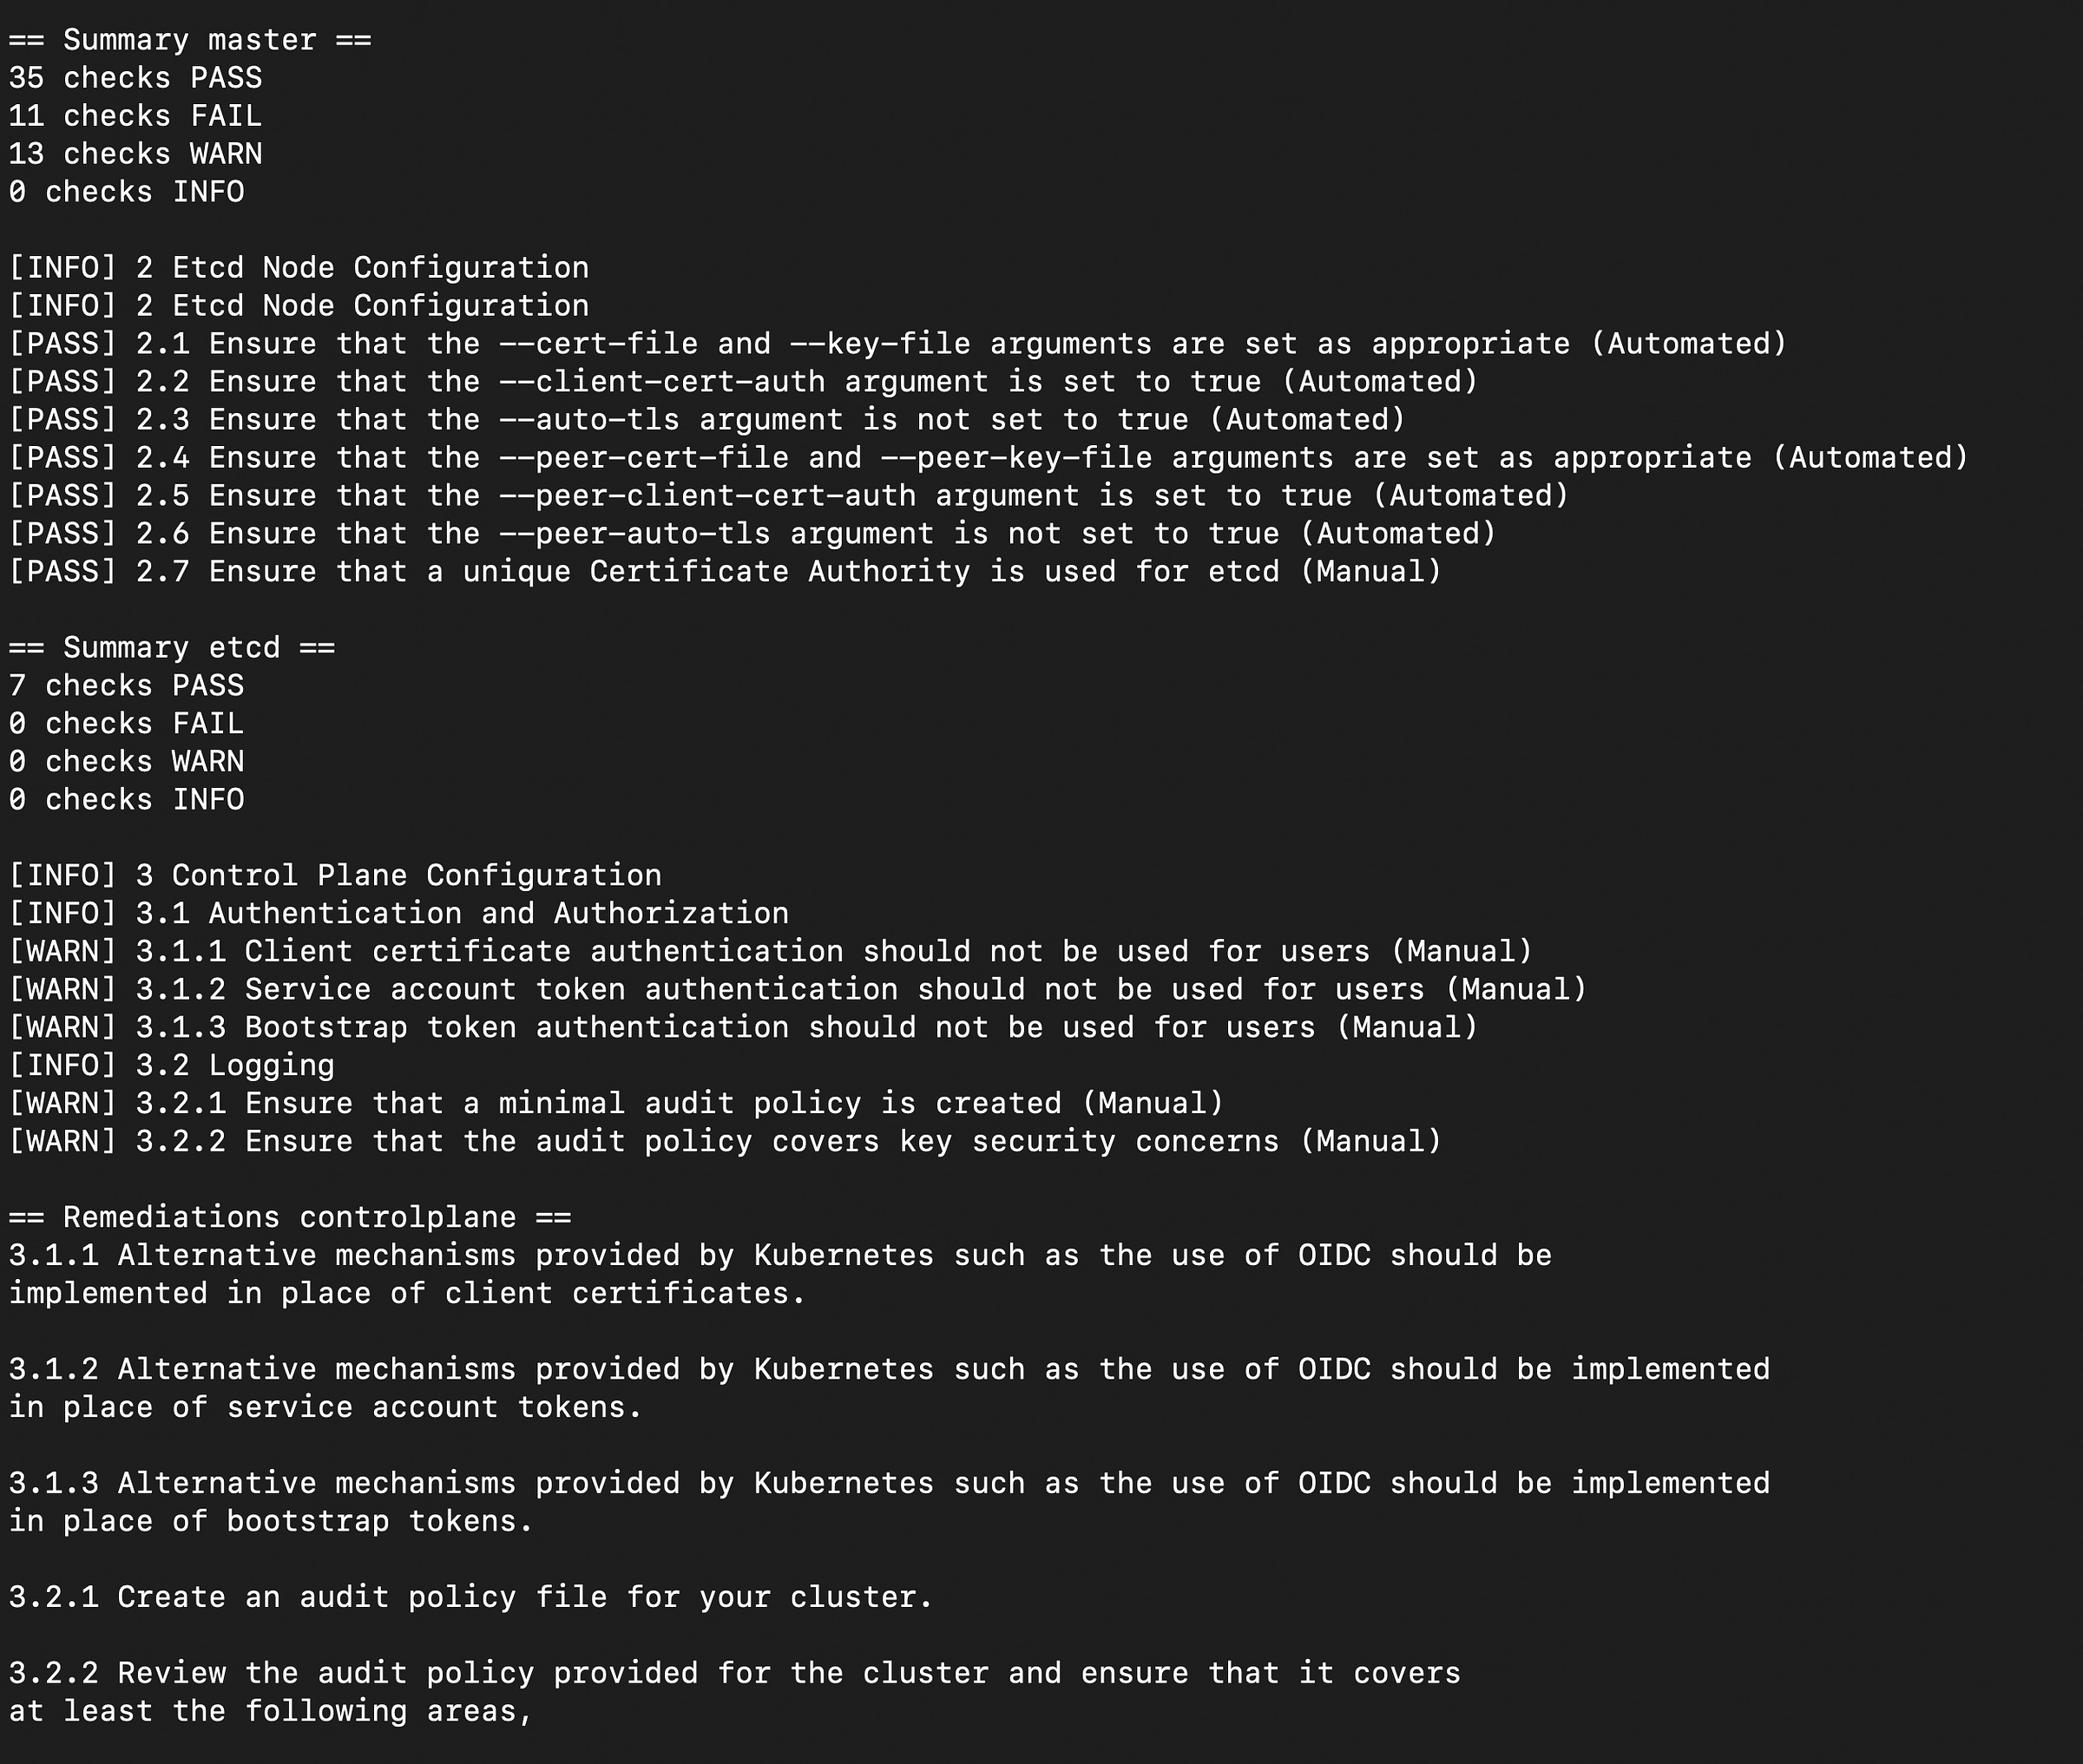
You will also get a component-wise summary of the passed, failed, warn and info checks along with the control description and remediations as seen in the below image. If you scroll to the end, you will find the “summary total” section.
Step 2: Fix a Vulnerability
It’s important to also fix the vulnerabilities now. Let’s find a [FAIL] and fix it. A common finding in default setups is “”. Let’s try to fix it.
Fix #1: Lock Down the etcd Data Directory
The Finding (from
kube-bench):[FAIL] 1.1.11 Ensure that the etcd data directory permissions are set to 700 or more restrictive (Automated)The Risk:
etcdis the brain of your Kubernetes cluster. It's the database that stores everything: all of yourPods,Deployments,ConfigMaps, and, most importantly, yourSecrets. If its data directory has loose permissions (e.g.,755), other users or processes on the master node could potentially read the files within it. This would lead to a complete compromise of the entire cluster. Setting the permissions to700(drwx------) ensures that only the owner (theetcduser) can read, write, or enter the directory, strictly enforcing the principle of least privilege.The Fix: We need to change the directory’s file permissions using the
chmodcommand. The default data directory foretcdin most setups is/var/lib/etcd.
In managed environments like minikube, manual permission changes made via SSH can be automatically reverted. Therefore, the most reliable and 'Kubernetes-native' way to fix this is to apply the permission change as part of the same Job that runs the scan. We will use an initContainer, a special container that runs and completes before the main kube-bench container starts, to set the permissions correctly and reliably.
Step 1: Find Your Cluster’s etcd Data Directory Path
First, we need the exact path to the etcd data directory, as it can vary. Run the following command from your local terminal to find it:
minikube ssh
cat /etc/kubernetes/manifests/etcd.yaml | grep data-dir
The output will give you the path. It will look something like - --data-dir=/var/lib/minikube/etcd. Copy this path (e.g., /var/lib/minikube/etcd) for the next step.

Step 2: Create the Correct job.yaml
Now, create the job.yaml file. This version includes the initContainer that will apply the fix automatically. Paste the path you found in Step 1 into the three places marked <PASTE-YOUR-ETCD-PATH-HERE>.
apiVersion: batch/v1
kind: Job
metadata:
  name: kube-bench
spec:
  template:
    spec:
      hostPID: true
      initContainers:
      - name: fix-etcd-permissions
        image: busybox:latest
        command: ["sh", "-c", "chmod 700 /var/lib/minikube/etcd"]
        volumeMounts:
        - name: etcd-data-dir
          mountPath: /var/lib/minikube/etcd
        securityContext:
          runAsUser: 0
      containers:
        - name: kube-bench
          image: aquasec/kube-bench:latest
          command: ["kube-bench"]
          volumeMounts:
            - name: etcd-data-dir
              mountPath: /var/lib/minikube/etcd
            - name: var-lib-kubelet
              mountPath: /var/lib/kubelet
              readOnly: true
            - name: etc-systemd
              mountPath: /etc/systemd
              readOnly: true
            - name: etc-kubernetes
              mountPath: /etc/kubernetes
              readOnly: true
      restartPolicy: Never
      volumes:
        - name: etcd-data-dir
          hostPath:
            path: /var/lib/minikube/etcd
        - name: var-lib-kubelet
          hostPath:
            path: "/var/lib/kubelet"
        - name: etc-systemd
          hostPath:
            path: "/etc/systemd"
        - name: etc-kubernetes
          hostPath:
            path: "/etc/kubernetes"
Step 3: Apply the Job and Check the Results
Now, apply this single, correct file and check the logs. Note : you will have to delete the old job before executing this step. kube-bench is a Job that cannot be modified after the Job has been created. The pod template (spec.template) is an immutable field.
kubectl apply -f job.yamlAfter waiting for the job to complete, get the new pod’s name (kubectl get pods) and check its logs. The scan will now show [PASS] for the etcd directory permissions because the initContainer fixed it just moments before the scan ran.
As you can see in the above image, we have successfully audited the configuration, identified a weakness, and patched it.
How to Fix the Other Findings
We have fixed a critical vulnerability, but your scan will likely have many other items marked as [FAIL]. The good news is that you have everything you need to fix them.
1. Use kube-bench's Built-in Guides
The kube-bench tool itself is your primary guide. If you scroll through the output in your terminal, you'll see that for almost every [FAIL], there is a REMEDIATION section. This section tells you exactly what to do. It will often give you the precise command to run or the configuration line to add to a YAML file. This is the most direct way to fix each finding.
2. The Official CIS Benchmark Document
For a complete explanation of every single check, including the reasoning behind it and detailed audit steps, you can refer to the official document from the Center for Internet Security (CIS). This is the master guide that kube-bench is based on. You can download it for free here: CIS Kubernetes Benchmark
By using the REMEDIATION advice from the tool and the detailed explanations in the official CIS document, you can systematically work through the remaining findings to fully harden your cluster.
We have now hardened our cluster’s configuration, reinforcing the fortress walls. But what happens if an attacker finds another way in? We cannot keep on checking the logs and fixing vulnerabilities manually.
In Part 2, we’ll place guards on those walls by setting up real-time threat detection with Falco.